The walkway which spans between the two main towers is the easiest part of the build and should be tackled first. You have the option of using either one of the assemblies (The one with two protruding lugs) as this will span a two lane track quite easily. You can extend the crosswalk by using the second section glued to the first. This will allow the building to span a 4 lane track, or if you choose a narrower track at a corner, near the pits or at an angle. We recommend you use super glue for this assembly, as it soaks into the MDF well and cures rapidly. Be aware that if you add windows to your kit, some super glue causes blooming (white marks) on clear sheet which can ruin the look. Test whatever glue you are using first on the acetate / clear plastic sheet first before you start. if you are using a slower drying glue, masking tape can be used to temporarily fasten parts to the work surface and to hold parts in place. When building these crosswalks, There are a few sections labeled IMPORTANT. Read these carefully, otherwise the final assembly will not be correct. If you do make a mistake, there is a way to still assemble the model, but this will mean cutting off some lugs and the finished model will look the same but won’t be as robust. As with all of our models, before you glue and assemble any part, have a trial fit of the part first. This cleans off any manufacturing debris and ensures that when you are gluing (Particularly if using super glue) the part can be pushed home quickly and held in place whilst the glue dries.
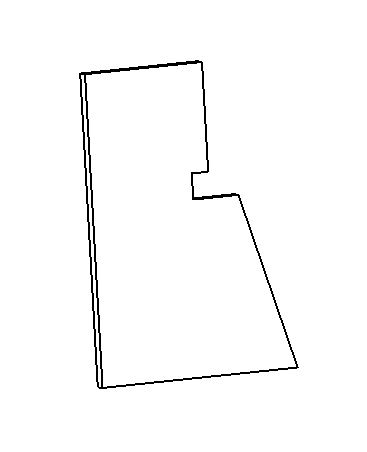
Included in the kit is a small assembly tool, in this part of the build we only use the right angled corner to help us get the ribs vertical, but do not throw it away as it is very important when assembling the large tower. below is an image of the part you are looking for.
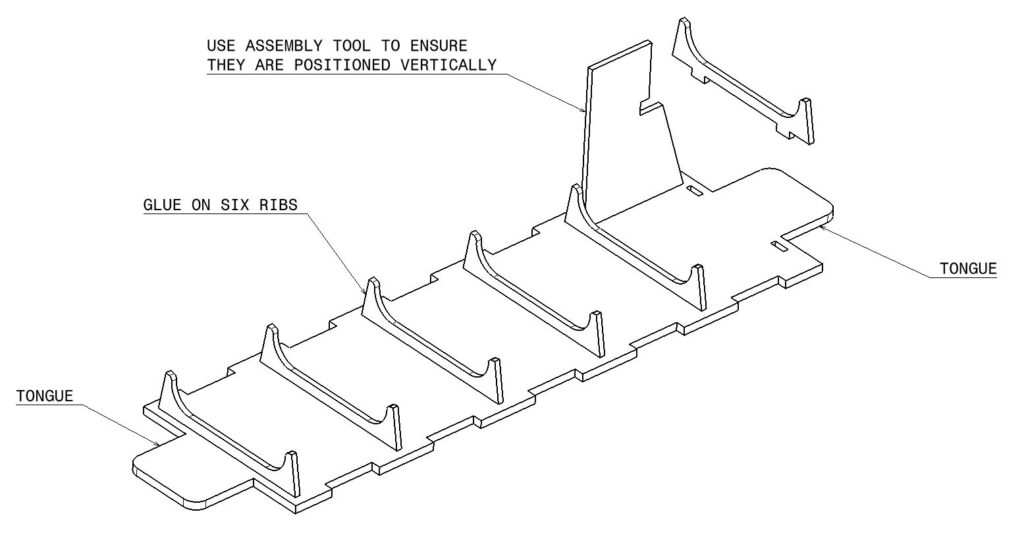
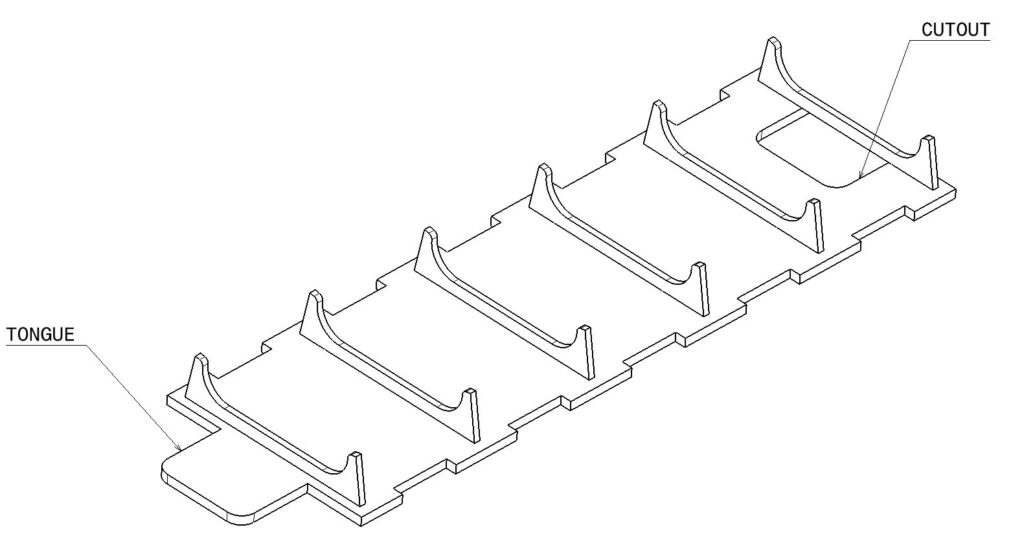
Find the inner roof in the kit. You can recognize this as it has a wooden tongue on either end. Also find six ribs. Apply a small amount of glue and push the part into the roof section. Use the assembly tool as shown to get the vertical to the roof part. Work from one end to the other so you have room to use the tool. make sure this is completely dry and solid before you go to the next stage.
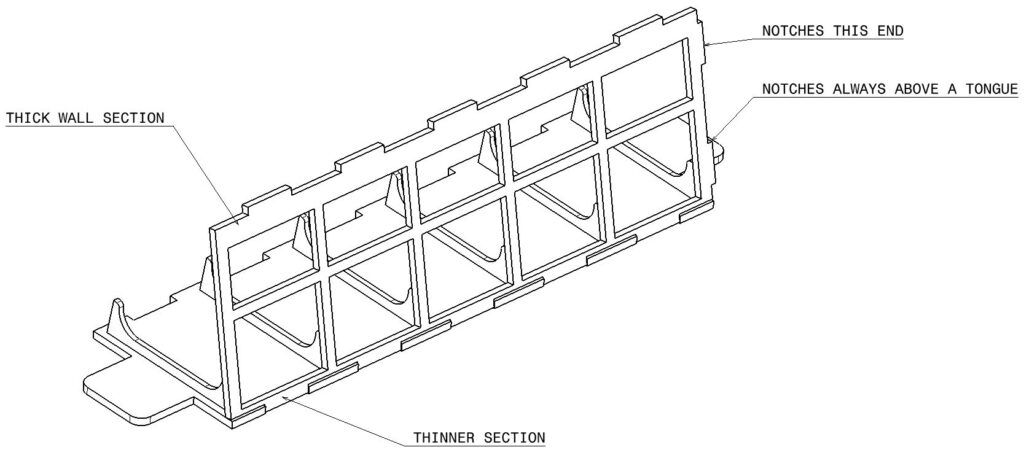
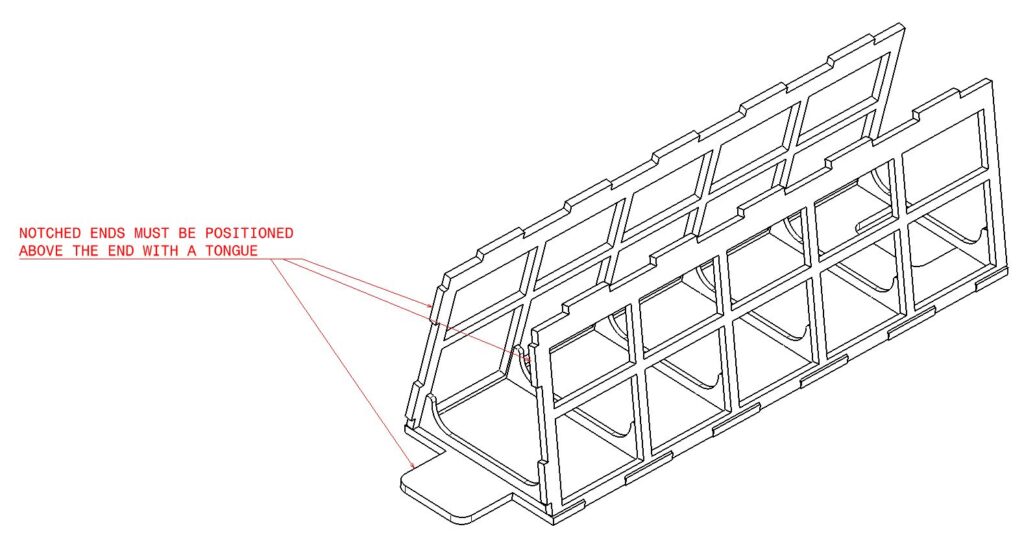
Now take out one of the inner sides. These are the ones without any etching. Please note that this side has two extra notches at one end. If you have begun to assemble the other crosswalk at the same time, these must be positioned at the end which has a tongue, NOT the cutout. We have modified the design a little now so it should not be possible to assemble these side pieces the wrong way around. Go to the next but one image to verify where they should go. Also note that the part has a correct orientation, the thicker section of wood is at the top. Apply glue where needed and assemble the part. ensure it is pushed down onto the work surface and pressed against the ends of the ribs, this way you get the angle exact. Take care here as it is easy to glue the whole assembly to the work surface, particularly if using super glue. Place a piece of paper under the assembly before gluing, so if this does happen, you can at least scrape off some glued paper rather than ruining the model. Take care to align the ends carefully with the roof section.
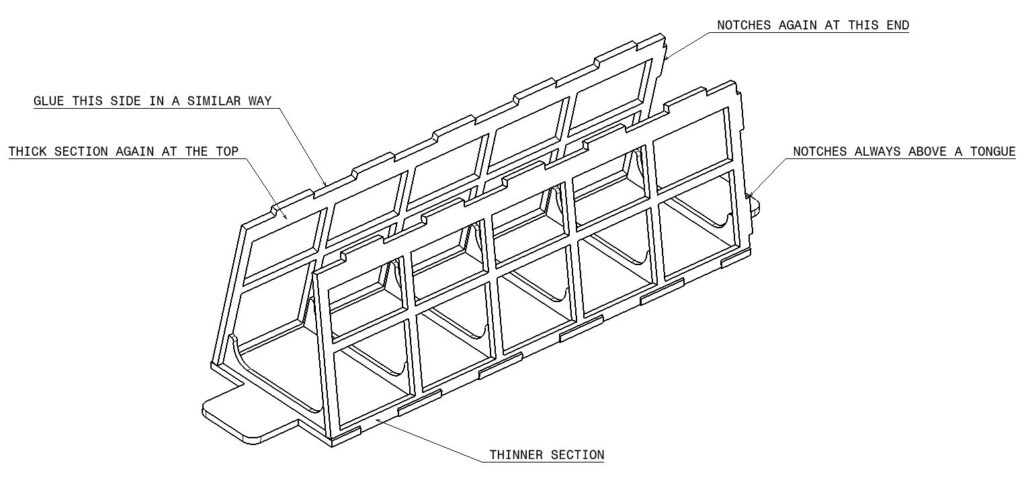
Complete the second side in a similar manner. There are notches on one end of this part, these must be positioned on the same end as the previous side. Again the castellation on this part has now been modified so it should not be possible to assemble this the wrong way around. Allow this to dry before continuing. Note if you are going to paint the inside, this is the last real opportunity you have before it is closed by the lower floor.
To lock the assembly, we add in the inner floor. This has no etched detail and is notched on both sides. glue and press the model together. The inner construction is now complete.
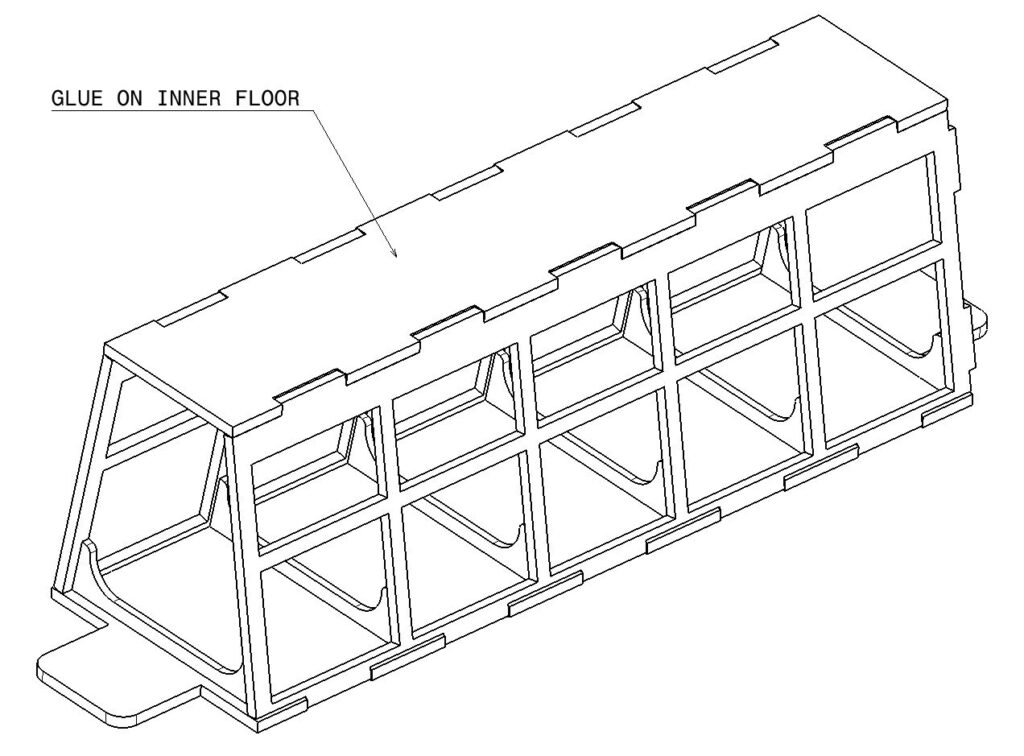
We now add on the outer wall. If you are going to add windows, now is a good time. The protruding lugs on the assembly leave a small gap between the inner and outer wall and it is in here that acetate sheet can be glued.
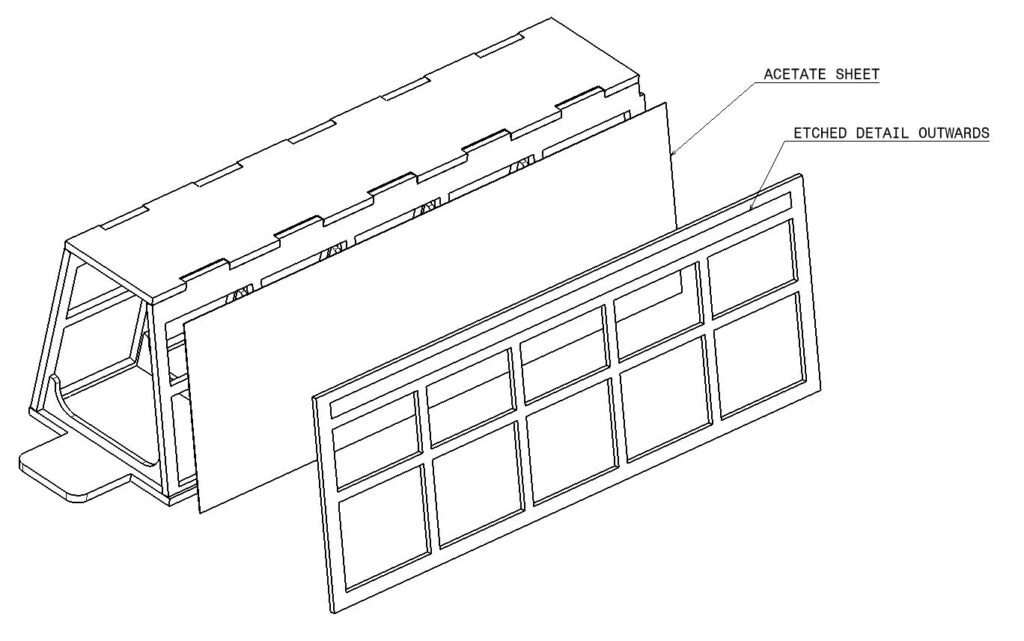
Ensure that the acetate sheet does not overlap the upper and lower lugs. A couple of drops of glue can help fix it in place. Then glue on the outer wall. It is possible to apply small drops of glue to where there is a cross in the window panes both inside and outside the acetate sheet. Again when gluing the outer wall make sure the lower edge is flush with the build surface and the ends are level. The lugs protrude a little top and bottom so a natural gap forms to accommodate the acetate sheet. Double check that you are assembling the part with the etched detail outermost.
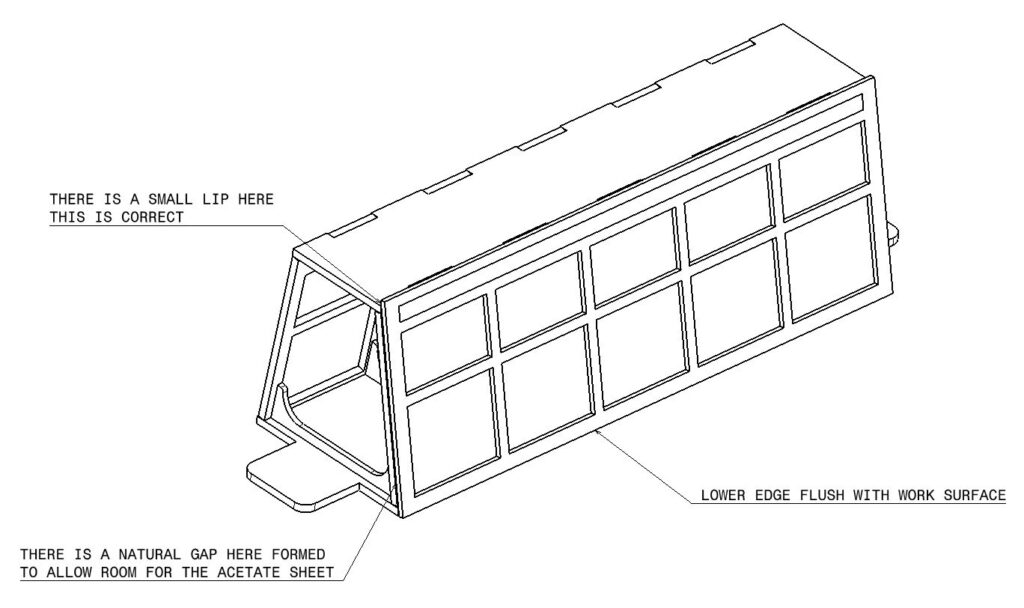
Glue on the outer floor. This is a simple rectangular part without any etched detail. Apply glue and press it home making sure it butts up against the side piece and the ends are flush.
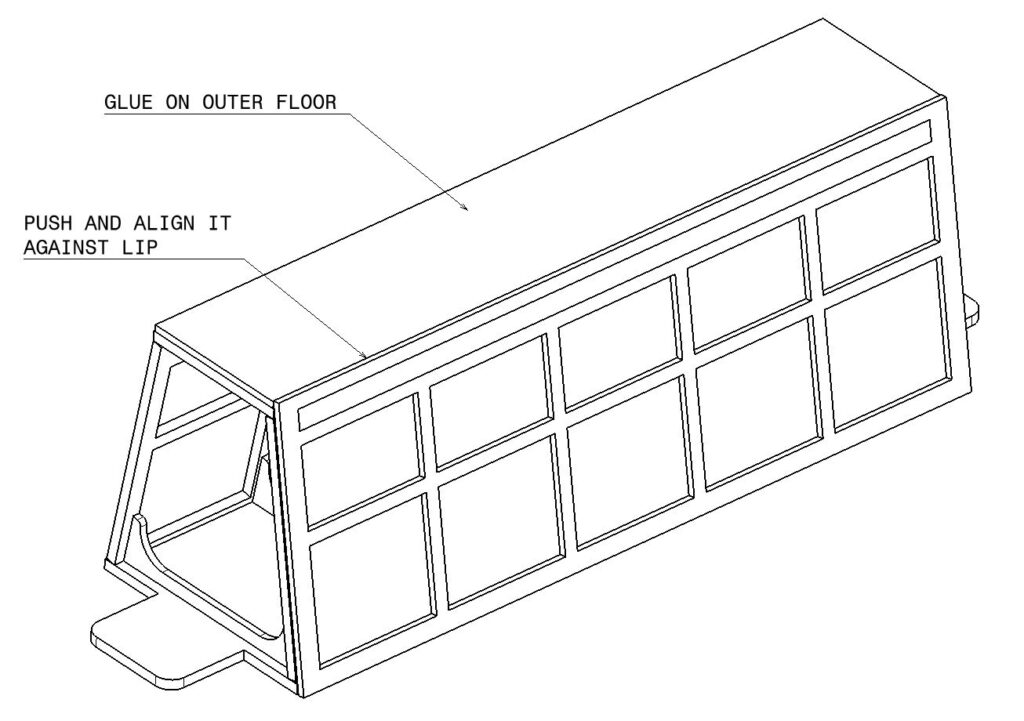
Glue on the second side (Adding in the windows beforehand if you want). Again remember the etched detail is on the outside.
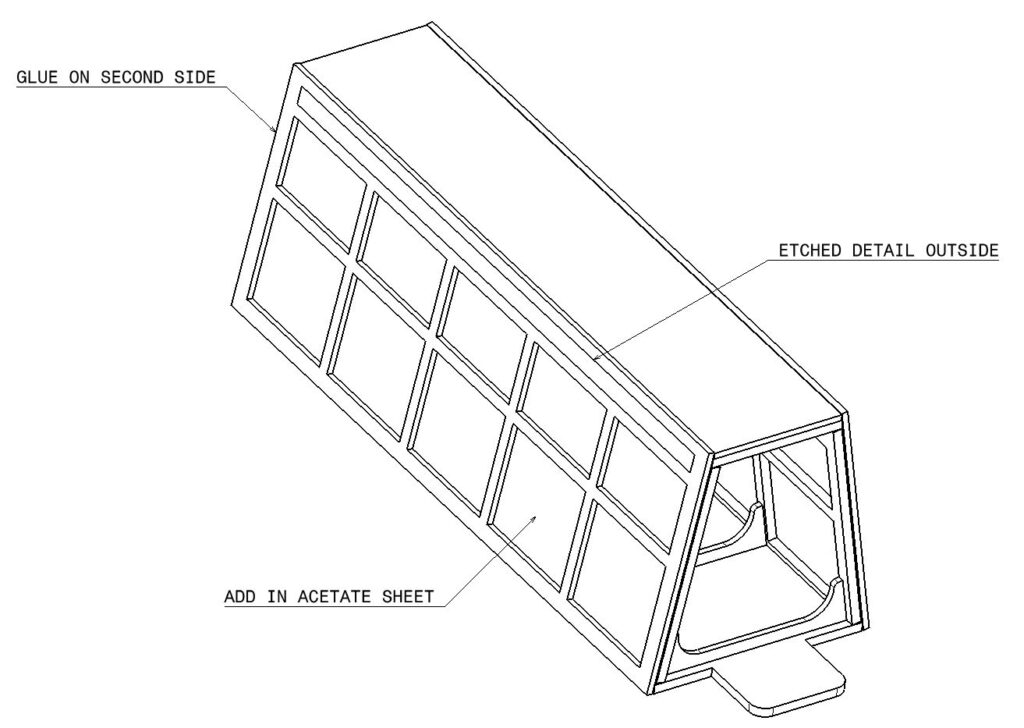
The final part is the outer roof. All of the edges are flush with the main model and the etched detail is on the outside.
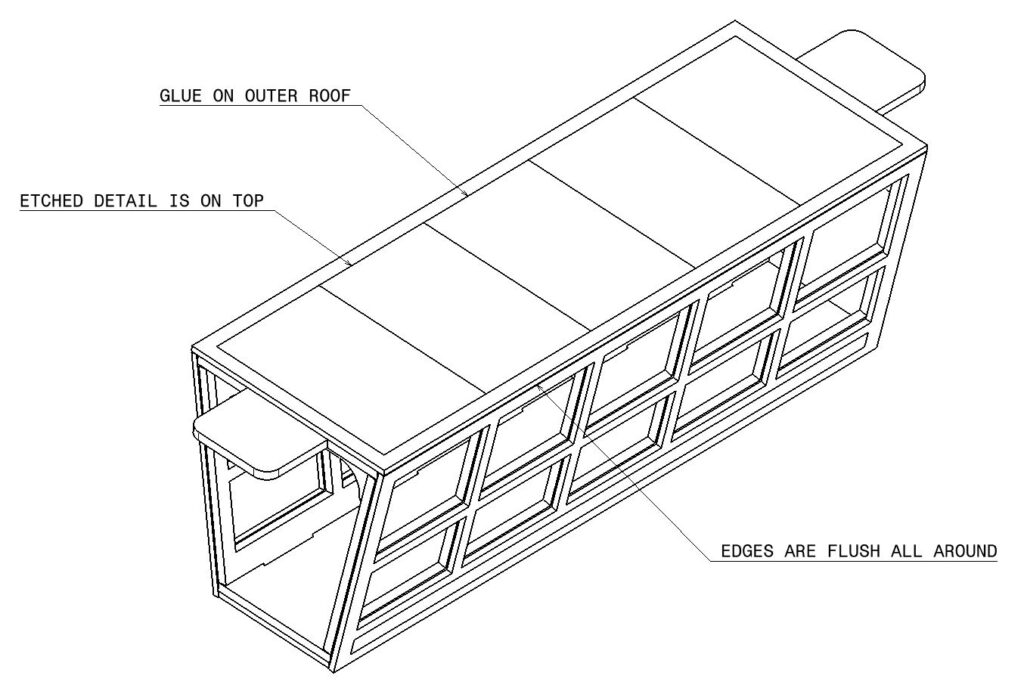
This completes the build for the first crosswalk. If you are going to have a short span 2 lane crosswalk, there is no need for you to build the second section, but if you are going for a 4 lane crosswalk, or just want the long span, proceed to make the second section. It is almost identical to the first, but the inner roof has one tongue and one cutout, so it will mate with the first part. See below. Just make sure no glue seeps into the cutout when assembling the last rib. If it does, take a sharp knife and scrape it out after it dries. This way the model will go together more easily at the final assembly stage.
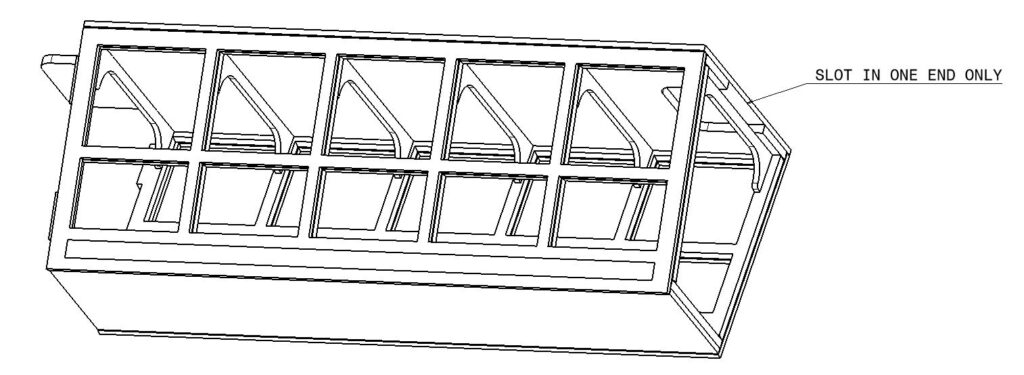
You must assemble the sides as shown below. The notched ends must be above the end with the tongue as shown in the following image. We have once more modified the castellation of this part so it should not be possible to assemble it the wrong way around.
When you have finished you should have a second walkway as shown below.
Congratulations you have completed the first part of the build. Keep the assembly tool handy as we proceed to the building of the towers.

